Quilling is the art of rolling thin strips of paper into a variety of coils and shapes to make small intricate patterns. Using corrugated cardboard means you can supersize the quilled decorations.
To make a snowflake
These snowflake decorations do not rely on a cookie cutter to create the shape. Once you learn the basic shapes, you can create any pattern you like.
1 Cut seven 2 x 70cm strips from the corrugated card.

2 Roll one strip into a tight, round coil to form the centre of the snowflake. This coil should be approximately 3cm in diameter.

3 Make a crease in another strip, 20cm from one end. Roll a tight coil into this crease, then fix in place using a glue dot. Roll the rest of the strip into a relaxed coil around it.
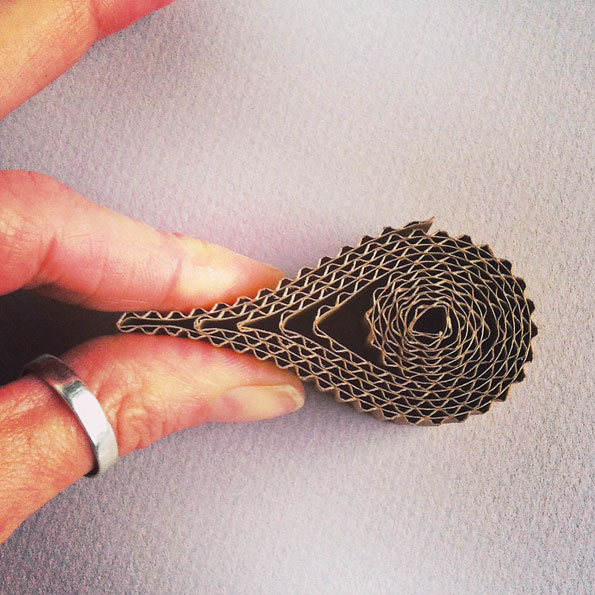
4 Hold the coil tightly in one hand (between thumb and forefinger is easiest) and squash it into an oval shape approximately 6cm long (this may require a little adjustment of the relaxed coil to get the right size). Fix the free end in place with a glue dot.

5 Pinch the relaxed coil between your thumb and forefinger to create a loose teardrop shape.
6 Coat one side of the rounded half of the teardrop with PVA glue and hold it in place until it feels tacky (a hairdryer helps speed this up). To make the other points of the snowflake, repeat steps 3-6.

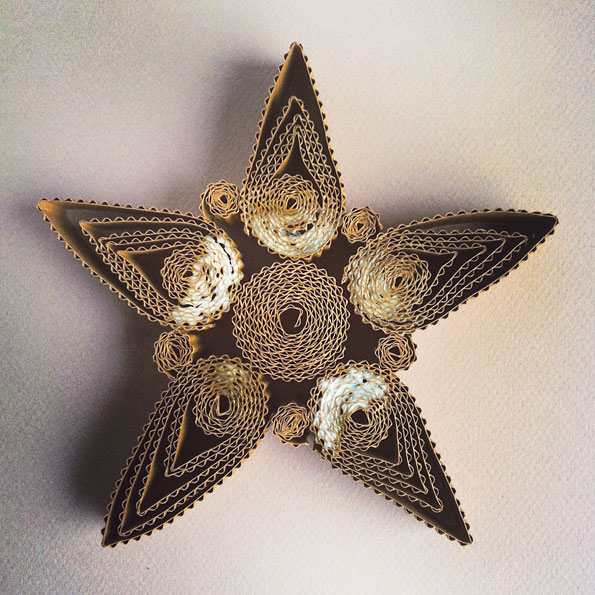
7 Cut one of your 2 x 70cm strips into five 10cm lengths and roll these into tight coils. On a flat surface, arrange the coils and teardrops so they form a snowflake shape.
8 Cover the snowflake with PVA glue, making sure you spread it over all areas where the coils and teardrops meet. Allow to dry overnight.
9 Once completely dry, thread a length of ribbon through the top point of the snowflake to hang or simply stand.